Showing posts with label dessert. Show all posts

Wednesday, 21 October 2015

All Your Children


I finally bought a waffle maker! It is a single rotating waffle maker which doesn't take too much space on my small kitchen counter top. This is a made in China brand with a weird name(Rohe) but I'm very happy with it. It is not very expensive and comes with an indicator light which tells you when the waffle maker is ready to use and done. The non stick grids make it easy to remove freshly cooked waffles and clean too.


Prior to the delivery, I looked up some waffles recipes and came across this. The name caught my attention, and this is the only recipe that I have tried. There was no turning back to others. This recipe yields only 3 waffles which is just right for me. Crisp, light and fluffy which is the texture everyone likes.


You can have waffles in many ways and I like it sweet and simple. Pure maple syrup with fruits, or plain with butter and syrup. These waffles do not taste nice on its own. The batter is really basic and easy to mix. It uses buttermilk and I always use real buttermilk, never substitutes.
It is fun to make waffles at home and even my children are making them for breakfast and tea. I bet they will not be ordering waffles at cafes anymore! These are like cafe standard or even better!


Waffles
serves 3

Ingredients

105g all purpose flour
30g cornflour
1/2 tsp baking powder
1/4 tsp baking soda
1/2 tsp salt
1 1/2 tsp sugar

1/2 cup whole milk
1/2 cup buttermilk
1/3 cup corn oil
1 large egg, lightly beaten
1/2 tsp vanilla extract


Method


  • Mix and stir all the dry ingredients together.
  • Mix and lightly blend wet ingredients with a whisk
  • Pour wet ingredients into dry. Whisk until smooth and lump free.
  • Rest mixture for 30 minutes.
  • Pour waffle mixture into pre heated waffle maker.


Children need the peace that comes from knowing they have a loving Heavenly Father who sent His son, Jesus Christ, to bring light and hope into the world.


All your children shall be taught by the LORD, and great shall be the peace of your children.
Isaiah 54:13


Monday, 12 January 2015

Every Good and Perfect Gift


My first experience of Mille Feuille was from a plane meal tray more than 30 years ago. Mille Feuille is a traditional French pastry made from puff pastry and custard cream. Mille Feuille is not an easy dessert name to remember partly because it is hard to pronounce if you are not a native speaker. I have heard the dessert being pronounced differently by people who are proficient in French.


Forget the French name if you have trouble with the letter L there. This pastry is also known as Napoleon. But I think Mille Feuille sounds more elegant for this stunning dessert.


At first look, the dessert looks complicated but in reality it is quite easy to do. For simplicity, I use store bought ready roll puff pastry. I just need to cook custard cream which I did the night before, a box of strawberries and I'm ready to assemble.


Strawberry Mille Feuille
Adapted from Home Cooking Advenure
serves 3

Ingredients

1 frozen puff pastry 10" x 10"
1 tbsp powdered sugar

Vanilla Pastry Cream

1 cup milk
1 tsp vanilla extract
2 egg yolks
1/4 cup sugar
1/8 cup cornstarch
pinch of salt
1 tbsp unsalted butter, 20gms
fresh raspberries
Powdered sugar, for dusting the top

Method

Vanilla Custard Cream

  • Prepare the pastry cream. Whisk the egg yolks and sugar until slightly pale. Incorporate the cornstarch and salt.
  • Pour the milk into a saucepan and bring to a simmer. Pour about a third of the hot milk over the egg yolks mixture. Pour the whole mixture into the saucepan over the milk. Bring to a boil while stirring. Remove from heat and add vanilla extract.
  • Pour the cream into a clean bowl and allow to cool for 10 minutes then incorporate the butter while stirring. Cover with plastic wrap, pressing it directly onto the surface of the pastry cream to prevent forming a skin on the surface. Refrigerate until chilled.
Puff Pastry

  • Preheat the oven to 165C(180C). Butter a baking sheet and line with parchment paper. On a floured surface roll out the puff pastry dough to a rectangle of 1/10 inch thickness.

  • Using the rolling pin transfer the dough to the prepared baking sheet. Prick the dough with the fork and cover with another sheet of parchment paper.

  •  Place another baking sheet on top to prevent the dough from puffing to much. Bake for about 25 minutes until lightly golden.
  • Remove from the oven and allow to cool completely.
  • Preheat the oven to 240C.

  • To caramelize the pastry, sprinkle about 1 tbsp powdered sugar, in a thin layer over the baked pastry. Bake (grill) for few minutes using the broil function until the sugar is melted.
  • Caramelize the other side of the puff pastry. When chilled trim the edged and cut the pastry in 3 rectangles.
Assemble


  • Assemble the mille feuille. Place one layer of caramelized puff pastry on the serving plate. Fill a pastry bag fitted with a 1/2 inch plain round tip with pastry cream. Spread pastry cream over the top and add strawberries. Place another layer of puff pastry on top of the filling. Add pastry cream strawberries and the last layer of pastry. 

  • Allow to chill in the fridge for a couple of hours or overnight before cutting it for serving. Sprinkle with powdered sugar before serving.


This post is linked to Bake Along hosted by Joyce from Kitchen Flavours, Lena from Frozen Wings and Zoe from Bake for Happy Kids.


Every good and perfect gift is from above, coming down from the Father of the heavenly lights, who does not change like shifting shadows.James 1:17


Tuesday, 21 October 2014

Be Patient


Everyday we learn new things. Nothing is frivolous. Today I learn something about maple syrup and the differences between pies and tarts. I learn maple syrup is graded according to the Canada, United States, or Vermont scales based on its density and translucency.

I have always buy pure maple syrup for pancakes but have never known its grading and colour. There are also not much choices to buy here. The most popular brand is Macdonald's maple syrup which is labelled as 100% Pure Grade A, dark amber. Pure maple syrup is not cheap and once you have tried pure maple syrup on waffles and pancakes, you will never go for the flavoured ones.

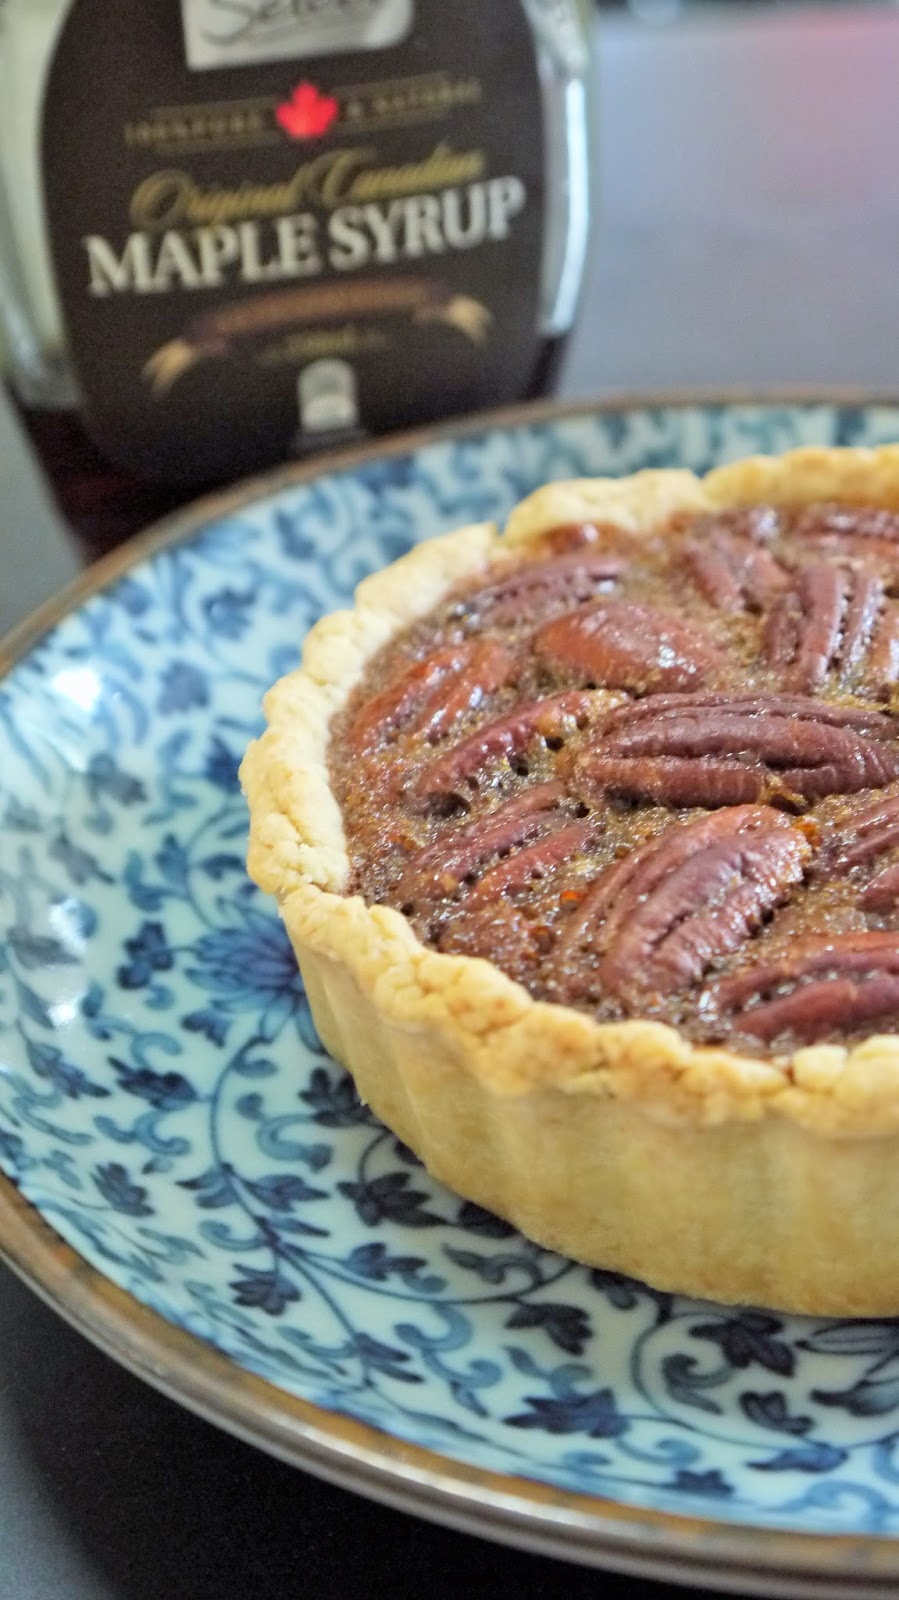
The maple syrup which I am using for this Maple Nut Pie was bought from Australia. I was looking for its grade but couldn't find any. It is simply labelled as original Canadian maple syrup. I suspect the syrup is adulterated with corn syrup though it is very dark with a rich maple flavour. This is a typical Grade B which is used primarily for cooking and baking.


Is there a difference between a pie and a tart? Yes, there is. They are like close cousins with distinct differences.
 A pie is a sweet or savory dish with a crust and a filling. According to thekitchn.com, the sides of a pie dish or pan are sloped. It can have just a bottom, a top or both a bottom and a top crust. Pies are served straight from the dish in which were baked.

A tart is a sweet or savory dish with shallow sides and only a bottom rust. Tart crusts are usually made from pastry dough traditionally flour, unsalted butter, cold water, and sometimes sugar. Tarts are baked in a pan with a removable bottom, or in pastry ring on top of a baking sheet so that it be unmolded before serving.

Well, my Maple Nut Pie obviously has the tart look. I used a removable base tart tin, and I hope it is acceptable in Bake Along. I do not have a pie dish but I followed the recipe closely. I adapted the recipe from Lena of Frozen Wing, I thought her Maple Nut Pie looks fantastic. I just love her rustic looking pie.


Maple Nut Pie
Williams Sonoma Baking Book
half of the original recipe, makes two 12cm pie

Pastry Dough

Ingredients

200gm plain flour
1/2 tbsp sugar
1/8 tsp salt
63 cold butter, cut into cubes
3 tbsp ice water

Method


  • In the bowl of a food processor, combine flour, sugar, salt and pulse to blend. Add the butter and pulse 5-6 times until the mixture of texture of coarse meal with butter pieces are larger than small peas.
  • Add 3 tbsps of water, pulsing once after each addition and adding just enough to make crumbly dough, it will not hold together on its own but when gathered into ball with your hands. Add more water if necessary, 1 tbsp at at time.( I mixed the dough by hand)
  • Transfer the dough onto a floured work surface, roll into a ball and flatten into a disk with a few gentle taps of the rolling pin. Lift the dough and give it a quarter turn and roll out. Continue to turn and roll out to a wider circumference than your pan. 
  • Transfer the dough to the pie dish or tin, trim the edge of the dough round, leaving about 2 cm overhang. Fold the overhang under itself and pinch it together to create a high edge decoratively and freeze the pie shell until firm, about 30 minutes. 
  • Lay a foil paper and put in some pie weights or raw rice and partially bake the pie shell on a preheated oven at 190C for about 20 minutes. Remove the beans and further bake for another 10 minutes until the shell is pale gold.
  • Remove from oven. While the shell is baking, can proceed to make the filling.

Filling (for one 12cm tart tin)
1 cup maple syrup (half cup)
1 large egg, lightly beaten (1 small egg)
2 tbsp brown sugar
pinch of salt
1 tsp unsalted butter,melted
1/2 tsp vanilla extract
90gm pecans, coarsely chopped ( top pie with nuts, 50gms)

Method

  • In a saucepan, over medium heat, bring the maple syrup to a boil and boil for about 4-5 minutes to reduce by about one fourth. Remove from heat and pour into a heatproof bowl or measuring pitcher. The syrup should reduced to about 3/4 cup(1/4) or a little less. If necessary, return to boil until the syrup is sufficiently reduced. Let cool down for a while before proceeding.
  • In a bowl, stir together the eggs, sugar, reduced maple syrup, salt, melted butter and vanilla until well mixed. Add the pecans and stir well. Pour into the partially baked pie shell, making sure the pecans are evenly distributed.(I top the shell with pecans instead). Bake the pie until the center is slightly puffed and firm to touch, about 30 to 40 minutes (25minutes). Remove and let cool on the wiring rack.


This pie should really be eaten with a scoop of vanilla ice cream. It is  perfect accompaniment to pecans and maple syrup.


This post is linked to Bake Along 69 hosted by Joyce, Zoe and Lena.


Be patient, then, brothers and sisters, until the Lord's coming. See how the farmer waits for the land to yield its valuable crop, patiently waiting for the autumn and spring rains.
James 5:7

Monday, 1 September 2014

Do Not Merely Listen To The Word


I'm not sure about you but I love the caramelised taste of gula melaka or palm sugar. Gula melaka is a common ingredient used in making many Asian desserts. It has rich flavour and deep colour, and goes very well with coconut milk.

My friend A shared this recipe with me, I have made this dessert several times and everybody loves it. This dessert tastes best if cooked with fresh coconut milk, and using good quality gula melaka. Gula melaka agar agar is traditionally served in diamond shaped cut, and on banana leaves.


Gula Melaka Agar Agar
7 inch square pan

Ingredients

1 pack of agar agar powder
750ml water
1 block of gula melaka about 200g (you can use more if you prefer sweeter)
250ml of coconut milk (fresh is the best)
a few pieces of Pandan leaves, knotted.


Method


  • Cut gula melaka into small pieces (easier and faster to melt)
  • Put gula melaka, water and pandan leaves into a pot and bring to boil. Stir until all the gula melaka have melted then put through a sieve to remove any sediments.
  • Lower the heat and add the coconut milk.
  • Allow the mixture to come back to a slight boil at low heat. Don't over boil.
  • Remove from heat and pour the jelly mixture into a pan/mould of your choice. Traditionally this is made in a aluminium square or rectangle tray then cut to diamond shape when set.
  • The jelly will separate into two distinct layers as it cool, try not to shake or move the container about when it's cooling.
  • Chill in the fridge until they're ready to eat.


Bible Study is on the Book of James. James is a book about practical Christian living that reflects a genuine faith that transforms lives. In chapter 1, we learnt that Jesus teaches believers to test their faith and be doers of The Word. James encourages believers to put their faith into action, and to be servants of Jesus Christ.

Do not merely listen to the word, and so deceive yourselves. Do what it says. James 1:22

Tuesday, 22 April 2014

Our Citizenship Is In Heaven


This has to be the best lunch I ever cook! Steak and Chips. from Nigellisma  TV series 1 episode 1. I have previously cooked an egg dish from the same episode.


TUSCAN FRIES


Tuscan Fries are chips deep fried with herbs and garlic but the method Nigella uses to deep frying the chips is new to me. The cut potatoes are soaked in room temperature oil and leave to cook till the oil boils. Then herbs and garlic are added into the hot oil.


 You may cringed thinking the potatoes are soaked with oil, but it is not. This method of frying is like the double frying method where you get crisper fries on the outside and melting tender on the inside.


TAGLIATA


Tagliata is steak cut into thin slices (tagliare simply means to cut),  is cooked first and marinate later. The cooked steak oozes with juices is then left on a marinade of herbs infused oil, slice and serve.


Tuscan Fries
Nigellisma
serves 4-6

Ingredients

1 kg waxy potatoes
1.5L corn oil or flavourless vegetable oil
1 head garlic, cloves separated but not peeled
8 sprigs thyme, rosemary or sage, or herbs of your choice (I used rosemary and thyme)
sea salt flakes, to taste


Method


  • Cut the short ends off each potato(but don't peel it) so that it can sit up vertically, and then slice it downwards into generous 1 cm slices. Cut these slices into chips about 1 cm thick, again err on the generous side. Load up a clean tea towel with the chips as you cut them.
  • Put the oil into a wide, heavy based pan (mine is approx 28cm ) and add the freshly cut potatoes. Then put the pan over a high heat and bring to a boil, which should take about 5 mins. Keeps careful watch on the pan at all times.
  • Continue to cook the fries, without stirring them, for another 15 minutes. Once the oil temperature reaches 160C, turn down the heat slightly and keep the fries cooking at between 150-160C. The pan will bubbling vigorously. If the oil gets too hot or bubbles too hard, reduce the heat a little, and always keeps close eye on it.
  • Now you can very carefully give the chips a gentle stir with a pair of tongs held in an oven glove, moving any that might stuck away from the bottom or sides of the pan. Add the unpeeled cloves of garlic to the pan, stir gently again, and cook for another 5-10 minutes (watching the temperature and making sure the garlic doesn't look burnt or the fries too dark), before testing a chip for crispness on the outside and tenderness on the inside. Do not burn your mouth! You might need another five minutes or so beyond this, but stand by your pan, the chips can turn from a cooked gold to a burnt bronze quickly (mine was almost bronze!)
  • At the point when the chips are pale gold, but crisp, toss in the herbs, then after a minute or so scoop everything out- using a couple of perforated scoops for ease, and wearing oven gloves to protect your hands- onto a tray or platter lined with a double thickness of kitchen roll. Once any excess oil has been absorbed, tip the chips off the kitchen paper clatteringly onto the plate and sprinkle with sea salt flakes to taste, serving immediately.


Tagliata
Nigellisma
serves 2

Ingredients

2 tablespoons extra virgin olive oil,plus some for oiling
1/2 teaspoon crushed red pepper flakes
1 teaspoon dried oregano just under a teaspoon
kosher salt or 1/2 teaspoon table salt, or to taste
2 teaspoons red wine vinegar
12 ounces New York strip steak (sirloin)
8 ounces cherry or grape tomatoes, halved
few sprigs fresh oregano, to serve (optional) (thyme)


  • Heat a grill pan or cast-iron or heavy non stick frying pan.
  • In a small dish that can take the steak snugly later, combine the evo, red pepper flakes, dried oregano, salt and red wine vinegar.
  • Oil the steak lightly and put it in the hot pan and cook for 2 minutes on each side, then remove it to the dish of spicy marinade and sit the cooked steak for 2 minutes a side in the dish. Your steak will be rare, but that's the way it's meant to be - although if you want to cook it for longer, I won't stop you.
  • Remove the steeped steak to a board, ready for slicing, and while it sits there, arrange the cherry tomatoes, cut-side down, in the marinade dish. Cut the steak into thin slices on the diagonal and arrange on a serving dish or 2 dinner plates. 
  • Smoosh the tomatoes around in the marinade, hen pour them, and the marinade over the ribbons of meat. Add a few leaves of fresh oregano, if you get them, and serve immediately.


Note: I cook for one with 2 potatoes and  230g of sirloin. This meal is cooked for my son and ends with a strawberry frozen yoghurt pop.


This post is linked to Cook like A Star  "All Stars" organised by Zoe from Bake for Happy Kids,
Mich from Piece of Cake and Joyce from kitchen flavours.


But our citizenship is in heaven. And we eagerly await a Saviour from there, the Lord Jesus Christ,
Philippians 3:20

Saturday, 15 February 2014

Have An Everlasting Life


I bought a bag of Meyer Lemons yesterday and used 3 of the lemons to made these lemonade popsicle.. Meyer lemons have a sweeter, less acidic flavor than the common supermarket varieties. Though they are more expensive and less commonly sold in supermarkets here, I prefer to use them for tarts, cakes, lemon curd and lemonade.


Meyer lemons are sweeter and juicier than regular lemons and they also have a beautiful floral aroma that add a wonderful note to the lemonade..


I have some leftover canned peach and pineapples slices which I used and also some strawberries and blueberries I found in the fridge.I mixed some of the pineapple syrup with the freshly squeezed juice. Pour into molds and freeze.


Fruity Lemonade Popsicle
makes 4
3 freshly squeezed Meyer lemon juice
A few tablespoons of pineapple juice
canned peach,pineapples
strawberries
blueberries
Popsicle mold


Happy Valentine's Day!


John 3:16

For God so loved the world that he gave his only begotten son that whosoever believeth in Him should not perish but have everlasting life.

Thursday, 31 October 2013

We Are Afflicted In Every Way


I never know baking tuiles can be such nerve wrecking.  There is no time to lose, Speed is the word..

Bake - 7-8 minutes in 180C oven

Assembly - roll or shape while still hot

Serve -  immediately


A successfully baked tuile breaks easily but rest assured nothing is wasted here because every crumbs is swiftly disposed of into this baker's tummy. These tuile crumbs are so delicious and additive.. 


This recipe is from The Chocolate Book. I cut a 6 inch circle drawn on a clear file as template. This half recipe makes  two 6 inch circle, and 3 scrolls, of which only 1 circle and 1 scroll survived the rolling and shaping.   It was quite a feat to roll and shape these delicate tuiles into scrolls and bowls!


Chocolate Tuile
Adapted from The Chocolate Book, Angelique Schmeink


Ingredients

2 tablespoon softened butter (30gm)
1/4 cup sifted icing sugar
a dash of vanilla extract
1 large egg white, lightly whisked with a fork
1/4 cup all purpose flour + 1/2 tablespoon cocoa powder,sifted


Method


  • Using a hand mixer, cream butter,sugar and vanilla to a paste.

  • Keep stirring while you gradually add the egg whites.

  • Continue to add the flour and cocoa in small batches and mix till batter is smooth.

  • wrap and chill in the fridge for at least 30 minutes.

  • Line a baking sheet and place a stencil on the baking sheet. Spread batter with an offset spatula.
  • Remove template and bake for 8 minutes.

  • Remove tuile from baking sheet, roll or shape immediately.


This post is linked to Bake-Along theme "Tuile" organised by Zoe, Lena and Joyce


We are afflicted in every way, but not crushed;perplexed,but not driven to despair;persecuted, but not forsaken;struck down, but not destroyed; 2 Corinthians 4:8-9
Related Posts Plugin for WordPress, Blogger...