Showing posts with label appetizer. Show all posts

Wednesday, 24 September 2014

We Also Glory In Our Sufferings


This is another wonderful and easy dish to make. Scallops with  Apple Pan Sauce can be served as a starter or as an accompanying dish to risotto, couscous and vegetables.

I was a little disappointed with the apple sauce when I tasted it after cooking. It wasn't that great, a little sourish but over the scallops, it was delicious. The pea shoots works well too as an accent to the dish. Overall, this dish is great to serve for a dinner party which you can prepare the sauce in advance. The scallops just take a minute to sear on each side. Fast, Fresh and Simple.


Scallops with  Apple Pan Sauce
servings 4
Bon Apppetit

Ingredients

2 Granny Smith apples
2 tbsp fresh lemon juice
2 tbsp olive oil
12 large sea scallops, side muscle removed (frozen)
kosher salt, freshly ground pepper
1 tbsp unsalted butter
1/4 cup hearty sprouts


Method


  • Core 1 apple, cut into 1 inchcubes. Place in a blender with lemon juice and 1/4 cup water;puree until smooth. 

  • Strain juice through a fine mesh sieve into a small bowl. Peel, core, and cut remaining apple into 1/4 in cubes. Add to bowl. Set aside.
  • Heat oil in a large skillet over medium-high heat. Season scallops with salt and pepper. Working in batches, cook scallops until golden brown and just cooked through, about 2 minutes per side. Transfer to a plate;tent with foil to keep warm.

  • Add butter to skillet. Cook, scraping up browned bits from bottom of pan. Add reserved apple mixture and cook, stirring often, until juice is thickened and apple pieces are tender, about 4 minutes. 
  • (Drain) and spoon over scallops;top with sprouts and season with salt and pepper. 


This post is linked to Little Thumbs Up 'APPLE' hosted by Kit from I-lost in Austen, organised by
Zoe from Bake for Happy kids and Doreen from My little favourite DIY.


God can bring blessings through those who know that life's goal is character, not comfort but hope.

Not only so, but we also glory in our sufferings,because we know that suffering produces perseverance; perseverance, character; and character, hope. And hope does not put us to shame, because God's love has been poured out into our  hearts through the Holy Spirit, who has been given to us. Romans 5:3-5

Wednesday, 13 August 2014

Because Of The Service


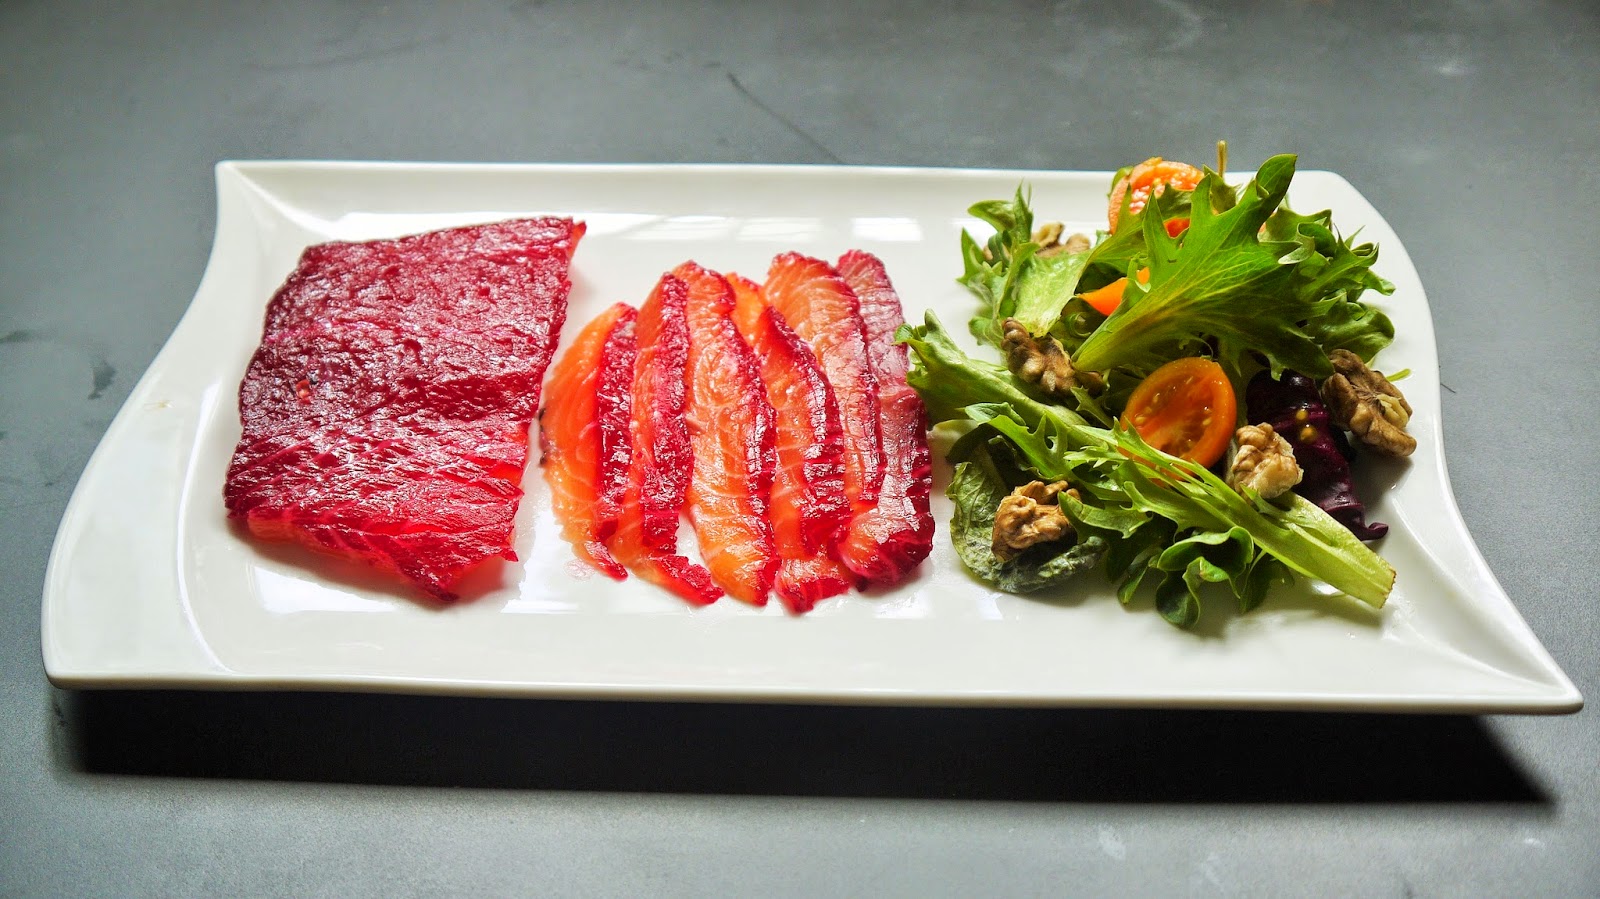
Salmon is one of my favourite fish to eat. I enjoy eating it raw, cooked or cured. I like to do my own curing because it is simple and cheaper to do at home.


Beetroot Cured Salmon gives the cured salmon a subtle earthly flavour and when combines with orange zest and crushed coriander seeds produce a lovely essence. The beet juice tint the edges of the salmon slices a bright rosy red colour which looks lovely on a bed of green salad.

The method of curing is from Gordon Ramsay's Ultimate Home Cooking video but I couldn't find the exact recipe. This is my estimated version.

Beetroot Cured Salmon
Gordon Ramsay

Ingredients

1 piece of salmon, 300g
1 tablespoon coriander seeds, crushed
1 beetroot, grated
1 big orange zest
1/3 cup rock salt
1/4 cup sugar
ground black pepper

Method


  • Combine and stir beetroot, orange zest, coriander seeds,ground black pepper, rock salt and sugar together.
  • Pat the mixture on the salmon and cover tightly with cling wrap. Place a heavy bottomed pan or pot to sit on the salmon and leave in fridge to cure overnight.(not more than 48 hours)
  • Remove the beetroot mixture and rinse under cold tap. Pat dry the salmon with kitchen towel and slice thinly. The salmon is ready to eat.


This post is linked to Cook Like A Star 'Gordon Ramsay' hosted by Zoe from Bake for Happy Kids,
Mich from Piece of Cake and Yen from Eat Your Heart Out.


Sunday School

Most Sunday school teachers don't expect much when it comes to appreciation. Many are teaching because they feel called to serve. They are willing to serve with little recognition and appreciation.
Last Saturday, we had our Sunday school retreat cum appreciation lunch. It was a time to evaluate progress and effectiveness and look into the new curriculum of study.


Appreciation gift


Because of the service by which you have proved yourselves, others will praise God for the obedience that accompanies your confession of the gospel of Christ, and for your generosity in sharing with them and with everyone else. 2 Corinthians 9:13

Sunday, 10 August 2014

This Is How We Know What Love Is


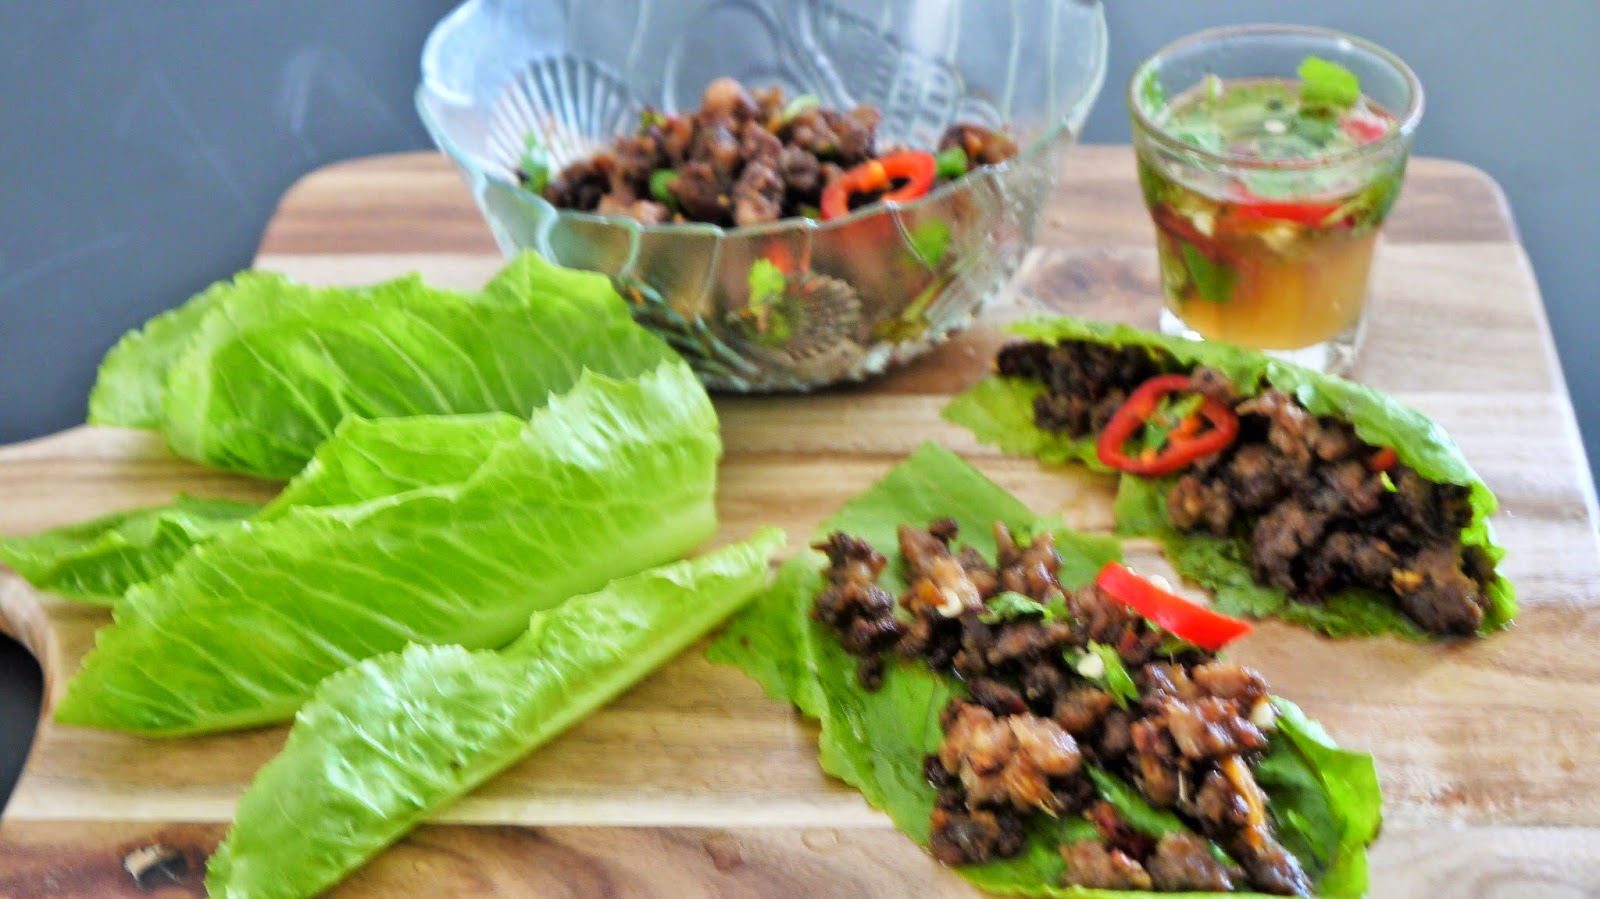
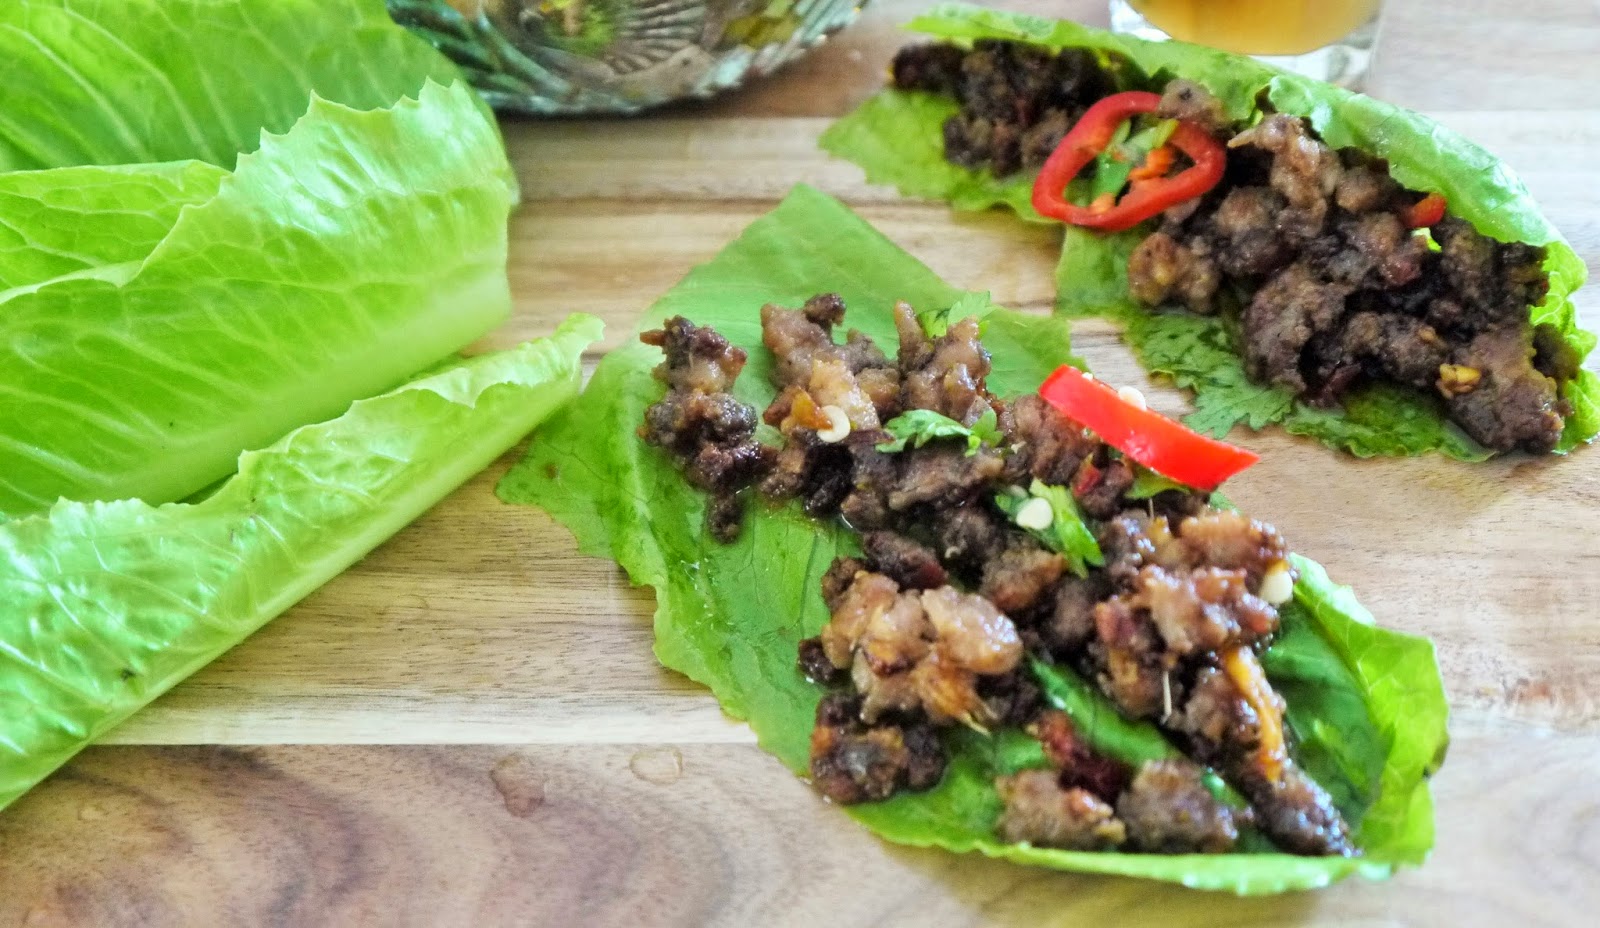
Great food doesn't have to be complex, as these simple Chilli Beef Lettuce Wraps shows. Fast, fresh and simple party food to prepare.  It won't break your bank too if you have a large crowd to feed.


I halve the recipe because I'm not sure if my younger son likes the food. Huge mistake. This is so appetizing! I like the accompanying sauce too. Sweet, sour and spicy. As I was chowing down the wrap, I thought of the Orange and Ginger Caramelised Chicken wings just made by Zoe. This is also another Thai inspired dish by Gordon Ramsay. How nice if I can have the wings too! That would make a very satisfying meal complete!

Ultimate Cookery Course Ep 2 Chilli Beef Lettuce Wrap


Its really important to get a good colour on the mince(mine is slightly unevenly browned). Strain the mince too after frying to keep it crisp


Chilli Beef  Lettuce Wrap
Gordon Ramsay
serves 4


Ingredients

olive oil, for frying
200g lean minced beef
200g minced pork
sea salt and freshly ground black pepper
Sesame oil, for frying
2 garlic cloves, peeled and finely chopped
5cm piece fresh root ginger, peeled and finely chopped
1-2 red chillies, deseeded and chopped'1 tbsp light brown sugar
1 tbsp fish sauce
Zest of 1 lime, juice of a lime
3 spring onions, trimmed and chopped
2 little gem lettuces, separated into leaves, to serve

For the Dressing
1 tbsp soy sauce
Juice of 1/2 lime
1 tsp sesame oil
1/2 red chilli, thinly sliced
Small bunch of coriander leaves, chopped
1-2 tsps fish sauce, to taste
1 tsp light brown sugar
1 tbsp olive oil


Method


  • Heat a large fring pan and add a little oil.
  • Mix the minced beef and pork together. Season with salt and pepper and mix well to ensure the seasoning is evenly distributed.
  • Fry the mince in the hot pan for five to seven minutes until crisp and brown and broken down to a fine consistency. Drain the crisped minced in a sieve - this will help it stay crispy. Set aside.
  • Wipe out the pan and add a tablespoon of toasted sesame oil. Add the garlic,ginger and chilli. Fry with a pinch of salt and the sugar for two minutes. Add he drained mince and stir to mix.
  • Add the fish sauce and heat through. Stir in the lime zest and juice, then add the spring onions, stirring for 30 seconds. Turn off the heat.
  • Mix all the dressing ingredients together and adjust to taste. Spoon some of the mince mixture into the lettuce leaves, drizzle with a little dressing and serve.


This post is linked to Cook Like A Star 'Gordon Ramsay' hosted by Zoe from Bake for Happy kids,
Mich from Piece of Cake and Yen from Eat Your Heart Out.


This is how we know what love is: Jesus  Christ laid down his life for us. And we ought to lay down our lives for our  brothers and sisters. 1 John 3:16

Saturday, 19 April 2014

Resurrection Day


Lately I have been quite addicted to having bruschetta for lunch. No fancy type of bruschetta, just the humble tomatoes or mushrooms on garlic rubbed toast, drizzled with extra virgin olive oil. Nothing could be more simpler, more tastier and healthier than this.

In one episode of Jamie at Home, Jamie and his friend Genonaaro are out foraging for mushrooms. They spotted and picked some types of porcini and make wild mushroom bruschetta out in the forest. Here, in my concrete kitchen, I made these mushroom brushetta with  mixed mushrooms pack bought from the supermarket.


Mushroom Bruschetta
Jamie At Home

Ingredients

300g mixed mushrooms (white button, swiss brown and portobello)
2 cloves garlic, chopped
2 sprigs of fresh thyme, leaves picked
6 sprigs of fresh parsley, chopped
20g butter
1 tsp chilli flakes
juice of 1 medium lemon
salt, pepper
olive oil
4 slices of sour dough bread + 1 clove garlic


Method


  • In a large pan heat 2-3 tablespoons olive oil.
  • Add mushrooms to the pan, give it a shake.
  • Add the chopped garlic,thyme and parsley.
  • Season with salt, pepper,chilli and leave to fry for 5-6 minutes.
  • Once the mushrooms have got some colour going on, add butter and lemon juice. Toss again and add 2-3 tablespoons of water into the pan to make a creamy sauce. Simmer for 1-2 minutes more until you have a simple sauce.
  • Toast the bread slices, rub them with garlic. Pile the mushrooms with the sauce on top of the bread.
  • Serve immediately.

This post is linked to Cook like a Star 'All Stars' hosted by Zoe from Bake for Happy  Kids, Mich from
Piece of Cake and Joyce from Kitchen Flavours


Resurrection Day(He Lives!)

He Lives to forgive us, to sustain us, to encourage us, to strengthen us, to correct us. We thank you for his living life that guides us all the way through life to the end, and then does not leave us desolate, but takes us on through to that life beyond.

Praise be to the God and Father of our Lord Jesus Christ! In his great mercy he has given us new birth into a living hope through the resurrection of Jesus Christ from the dead,
1 Peter 1:3


Thursday, 13 March 2014

My Grace Is Sufficient For You


 I am very blessed to have generous friends. Recently I received this bruschetta board from one of them. To make good use of my new gift, I made bruschetta. They are adapted from Jamie Oliver's book Jamie Italy.


Bruschettas are very simple and fast to prepare, The key is as always to use great ingredients for great results. You'll be surprised once you put these into your mouth! This is what you need to do for the dressing.

Bruschetta
Loosely adapted from Jamie's Italy

Ingredients

2 slices of bread
small grape tomatoes/egg plant
1 garlic clove
5 leaves of fresh basil leaves
3 tbsp olive oil
2 tsp white wine vinegar
1 garlic clove, minced
pinch of salt
pinch of ground pepper

Method


  • Slice tomatoes and eggplant. 
  • Toss eggplant slices with olive oil and grill on grill pan.
  • Mix the olive oil, vinegar, salt and pepper and minced garlic. Toss tomatoes and grilled eggplant in the mix. Tear basil leaves into thin strips, and mix in. Rest for 10 minutes.
  • Cut the baguette into 4 slices and rub in with a clove of garlic. Toast the bread until it turns golden brown. 
  • Place the tomatoes and eggplant on the toasted bread and garnish with some strips of fresh basil.


This post is linked to Cook Like A Star 'All Star Anniversary'. This is organised by Mich of Piece of Cake,
Zoe, Bake for Happy Kids and Joyce, Kitchen Flavour.


But he said to me, "My grace is sufficient for you, for my power is made perfect in weakness." Therefore I will boast all the more gladly about my weaknesses, so that Christ's power may rest on me.
2 Corinthians 12:9


Tuesday, 25 February 2014

Keep This Book Of The Law


Every Friday, I have bible study at a relative's house. I also have my lunch there and everyone takes turn to cook a main course or bring a dessert. This Friday, I will be cooking and I have just made hummus dip and flatbread for starter. I am planning to cook Beef Tajine and thought this appetizer is a good start to a Middle Eastern theme lunch.

One of the key ingredient in hummus is Tahini. Tahini is an important part of the hummus recipe and cannot be substituted. However it can be omitted. Hummus gets some kick with lemon and garlic, and also with ground cumin, a traditional spice to add in hummus. This recipe uses canned chickpea.

This is not a traditionally made hummus but I like the creamy texture and taste in this recipe.


Smooth Hummus Dip
Created by Joanne and Adam Gallagher

Ingredients

425g chickpeas, also called garbanzo beans
1/4 cup fresh lemon juice, about 1 large lemon
1/4 cup tahini
half of a large garlic clove, minced
2 tablespoons olive oil, plus more for serving
1/2 to 1 teaspoon kosher salt, depending on taste
1/2 teaspoon ground cumin
2 to 3 tablespoons water
Dash of ground paprika for serving


Method


  • In the bowl of a food processor, combine tahini and lemon juice. Process for 1 minute. Scrape sides and bottom of bowl then turn on process for 30 seconds. This extra time helps 'whip' or 'cream' the tahini, making smooth and creamy hummus possible.
  • Add the olive oil, minced garlic, cumin and the salt to whipped tahini and lemon juice. Process for 30 seconds scrape sides and bottom of bowl then process another 30 seconds.
  • Open can of chickpeas, drain liquid then rinse well with water. Add half of the chickpeas to the food processor then process for 1 minute. Scrape sides and bottom of bowl, add remaining chickpeas and process for 1 to 2 minutes or until thick and quite smooth.
  • Most likely the hummus will be too thick or still have tiny bits of chickpeas. To fix this, with the food processor turned on, slowly add 2 to 3 tablespoons of water until the consistency is perfect.
  • Scrape the hummus into a bowl then drizzle about 1 tablespoon of olive oil over the top and sprinkle with paprika.
Store hummus in an airtight container and refrigerate up to one week.


As an appetizer and dip, hummus is scooped with flatbread, such as pita. Here, I made flatbread using Jamie Oliver's recipe.


Linking this post to Little Thumbs Up "LEMON" hosted by Grace, Life Can Be Simple. Organised by Zoe from Bake for Happy Kids and Doreen from My Little Favourite DIY.


Keep this Book of the Law always on your lip; meditate on it day and night, so that you may be careful to do do everything written in it. Then you will be prosperous and successful. Joshua 1:8

Friday, 10 January 2014

Go, Eat Your Food With Gladness


I have been watching Gordon Ramsay's Ultimate Cookery Course every night and learning his cooking style and cooking tips. I chose to cook this dish, Mini Pork Sliders because he made it so simple and mouth watering. I like his creative way of mixing cooked bacon and onions into the meat patties. He also made a quick barbecue sauce which is very delicious and is a good standby for sandwiches.


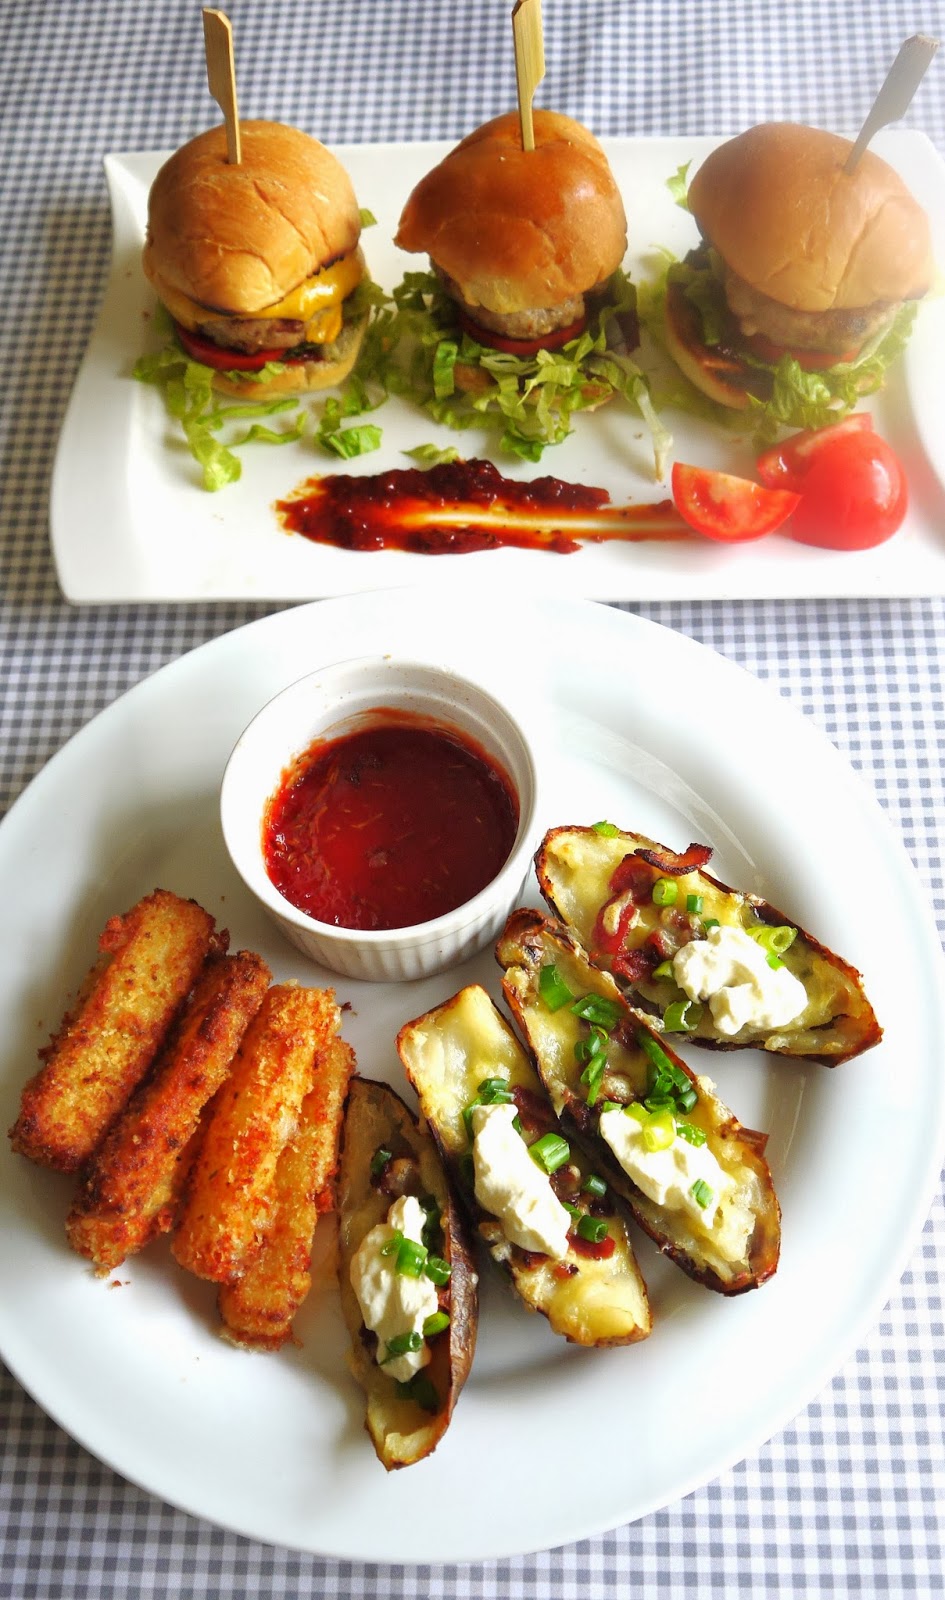
These mini sliders are great for parties. They have a smoky flavour from the bacon and paprika along with a sweet and sour homemade barbecue sauce. I cooked these mini sliders for lunch, and also Mozzarella Sticks and Potato Skins as starters. 


Mini Pork Sliders with Barbecue Sauce
Gordon Ramsay Ultimate Cookery Course
makes 6 patties
Ingredients

4 rashers of skinless smoked back bacon, finely chopped'
Olive oil, for frying
1 banana shallot, peeled and finely chopped (local shallot)
1 tsp smoked paprika
500g minced pork

For the barbecue sauce
Olive oil, for frying
1 small onion, peeled and finely diced'

2-3 garlic cloves, finely chopped
sea salt and freshly ground black pepper
1 tbsp brown sugar
1 tsp smoked paprika
1 tbsp cider vinegar
2 tsp worcestershire sauce
6 tbsp tomato ketchup

To serve
mini burger buns/bread rolls
baby gem lettuce leaves, shredded
slices of smoked cheddar cheese
slices of tomato


Method


  • First make the barbecue sauce. Heat the oil in a frying pan, add the onion and garlic with some seasoning and the sugar, and fry for 5 minutes until softened.
  • Add the paprika and stir to combine. Cook for 10-15 minutes until the onion is caramelising, then add the vinegar and let it cook out for a couple of minutes.
  • Add the worcestershire sauce and tomato ketchup, mix well and continue to cook for about 8 minutes until the sauce has reduced to a dropping consistency. Taste and adjust the seasoning as necessary.
  • Remove from the heat and set aside.
  • While the barbecue sauce is reducing, start preparing the burger mince. Fry the bacon in an oiled pan for about 5 minutes until almost cooked through. 
  • Add the shallot and continue to cook for 5 minutes until the shallot is tender and the bacon crisp.
  • Sprinkle in the smoked paprika and mix well. Continue to cook for 1-2 minutes, then remove from the heat, draining off any excess fat on kitchen paper.
  • Season the minced pork and mix well with the cooked shallots and bacon. Shape into balls the size of golf balls and flatten into patties.
  • Heat a large,heavy-based frying pan with a little oil. Season the patties and cook them for 1-2 minutes on each, basting with the juices until cooked through and coloured. Turn off the heat and leave them to rest in the pan. Top each patty with a slice of cheese allowing it to melt slightly.
  • Assemble your sliders in mini buns, layered with the barbecue sauce,lettuce and slices of tomato. Any remaining barbecue sauce will keep in the fridge very well. Serve immediately.


Go, eat your food with gladness, and drink your wine with a joyful heart, for God has already approved what you do. Ecclesiastes 9:7

Thursday, 9 January 2014

Keep Your Father's Command


Mozzarella Sticks,Potato Skins, and Sliders are so American restaurant food chain. They are also my children's favourites. They are popularly served as starters or party finger foods.

Both the mozzarella sticks and potato skins are easy to prepare. I usually do not refer to any specific recipes when making them. However, for this post and for the benefit of those who have not made them before, I shall refer to Ree Drummond's Pioneer Woman Cooks

Mozzarella Sticks


These are usually serve with a Marinara sauce or Ranch dressing dip. Like Pioneer woman, I also prefer to use panko because they are so light and crisp. 


Mozzarella Sticks
Adapted from Pioneer woman cooks 


Ingredients

16 pieces, String cheese, removed from wrappers(mozzarella block)
1/2 cups all purpose flour
2 whole eggs
3 tablespoons milk
1 tablespoons dried parsley flakes
Canola oil, for frying
Marinara sauce, for dipping
2 cups Panko bread crumbs


Method


  • Slice string cheese pieces in half, for a total of 32 pieces
  • Place flour in a small bowl.
  • In a separate bowl, whisk eggs and milk.
  • In another separate bowl, combine panko bread crumbs with parsley flakes.
  • One by one, roll mozzarella sticks in flour, then dunk in egg/milk mixture, then place in panko crumbs. 
  • Use your hand to sweep crumbs all over the mozzarella stick.
  • Repeat until  all mozzarella sticks are coated.
  • Heat canola oil in a large skillet over medium heat. When hot, add mozzarella sticks 8 at a time. Watch closely and turn over to evenly brown, cooking less than 2 minutes. 
  • Do not allow cheese to bubble and leak.
  • Remove to a paper towel-lined plate.
  • Serve immediately with warm marinara sauce.


Potato Skins


Potato skins are classics appetizer of the early 80s. Everyone loves potato skins and there is always never enough to go round. 


Potato Skins
Pioneer Woman Cooks, Ree Drummond

Ingredients

8 sliced thick cut bacon 
8 russet potatoes, scrubbed clean
Canola oil
Kosher salt
1 and half cup sharp cheddar cheese 
1 cup sour cream 
4 green onions, sliced 

Method

  • Preheat the oven to 400F
  • Fry the bacon and leave aside
  • Wash the potatoes and rib the skin liberally with canola oil. Place on a baking pan and bake for 45 minutes to 1 hour, until the potatoes are fork tender. ( I parboil the potato first to cut short baking time).
  • Slice the potatoes in half lengthwise. With a cookie scoop or spoon, scrape out the inner flesh of the potatoes, leaving a small margin of potato in the skins,
  • Brush both sides of the potato skins with canola oil. Salt both sides liberally.
  • Place the skins cut side down on the pan and return to the oven.
  • Bake for 7 minutes, then flip the skins to the other side.
  • Bake for 7 minutes more or until the skins are crispy.
  • Grate the cheddar and chop the bacon into bits.
  • Sprinkle cheese into each potato skin and then sprinkle with bacon and return to the oven just until the cheese melts.
  • Just before serving, spoon 1 tablespoon of sour cream on each skin and sprinkle with sliced green onions.


A good cook never let anything to waste. Can you guess what I made with the potato flesh?


I shall post the Mini Sliders recipe in the next post. The recipe is adapted from Gordon Ramsey Ultimate Cookery.

This post is linked to Little Thumbs Up 'Cheese' hosted by Alice from I love.I cook. I bake. This is organised by Zoe of Bake for Happy Kids and Doreen, My little favourite DIY.


This is also linked to Joyce, Kitchen flavours' 'CookYour Books' event.


Proverbs 6:20-23
My son, keep your father's command and do not forsake your mother's teaching. Bind them always on your heart;fasten them around your neck.  When you walk, they will guide you; when you sleep, they will watch over you; when you awake, they will speak to you. For this command is a lamp, this teaching is a light,and correction and instruction are the way to life.

Tuesday, 7 January 2014

You Will Be My Witnesses


Cheese straws, one of the best party nibbles to have are easy to make. Crisp and savory, they are ideal for  drinks, soups and salads.


                     These are baked at 18 minutes.


Cheese straws are popular snack of the Southern United States. Originally made in biscuit form, they now come in all shapes and sizes. They are traditionally made using a cookie press with a star nozzle, and dough made with flour,butter,salt,cheddar and cayenne. There are also cheese straws made from puff pastry and with other type of cheeses and herbs.

This is a traditional recipe adapted from the Lee Brothers' Southern Cookbook.

Cheese Straws


Ingredients

1 1/2 cups grated extra sharp cheddar cheese
4 tablespoons unsalted butter, softened (56)
3/4 cup flour, plus more for dusting
1/2 tsp kosher salt
1/2 teaspoon crushed red pepper flakes (moderately hot cayenne pepper)
1 tablespoon half and half (milk)


Method


  • Preheat oven to 350F(180C).


  • In a food processor, combine the cheese,butter,flour,salt and red pepper(cayenne) in five 5-second pulses until the mixture resembles coarse crumbs. Add the half and half(milk) and process until the dough forms a ball, about 10 seconds (mixed in Kitchenaid)
  • On a lightly floured surface, using a lightly floured rolling pin, roll the dough into an 8 by 10 inch rectangle that is 1/8 inch thick. With a sharp knife ( or a pizza or pastry wheel;both worked great),cut the dough into thin 8 inch strips, each 1/4 to 1/3 inch wide (dipping the knife in flour after every few inches ensures a clean cut)(didn't follow measurement)

  • Gently transfer the strips to an ungreased cookie sheet (parchment), leaving at least 1/4 inch between them. The dough may sag or may break occasionally in the transfer, but don't be concerned - just do your best. The straws can be any length, from 2 to 10 inches.(various length and thickness in two batches)
  • Bake the straws on the middle rack for 12-15 minutes (18mins 1st batch and 20 mins 2nd batch), or until the ends are barely browned.
  • Remove from the oven and set the cookie sheet on a rack to cool. Serve at room temperature. 
Note: Cheese straws will keep in the refrigerator, in a sealed container for two days. They will not last an hour at a party! For a crisper bite, bake at 20 minutes.

   These are baked at 20 minutes


This post is linked to Little Thumbs Up 'Cheese' hosted by Alice of I love.I cook.I bake, organised by Zoe from Bake for Happy Kids and Doreen from My favourite DIY


What Have I Learnt Today?

Last Sunday was the first week of Sunday School term. The lessons for the first term will be on the Book of Acts. The book of Acts gives an eyewitness account of the birth and growth of the early church. Acts records the apostles being Christ's witnesses in Jerusalem, Judea, Samaria and to the rest of the world.
The book also records the gift  of the Holy Spirit who empowers,teaches and serves as our guide.. There were many miracles being performed during this time by the disciples.

But you will receive power when the Holy Spirit comes on you; and you will be my witnesses in Jerusalem, and in all Judea and Samaria, and to the ends of the earth. Acts 1:8
Related Posts Plugin for WordPress, Blogger...